Although this is the final high poly version of the complete with UV map, this isn't the end for the dweller. I have taken the high poly version and made both a normal and displacement map and imported into maya where the new low poly version can have a face lift! I am also tempted to get this mesh 3D printed, possibly in colour, or I may want to paint it myself,time will tell! But for now that's the dweller done!
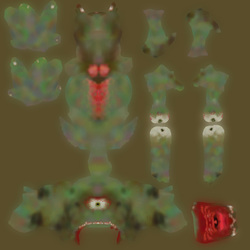 After the final detail pass of sculpting had been done, it was then time to start with the UV's. Now as you can see from the post dates it has been a while since I last worked on this mesh, and had forgotten where I was and what I was doing! So I decided to do the UV map from scratch. I'm not a big fan of doing UV editing so one of the reasons for this project was to find a smoother pipe line that worked for me when it came to the texture editing an creating maps. As the model was already in zbrush this was a good place to start. The map was first cut using the UV master plugin, trying to keep the map as simple and as intact as possible at this point. I was looking for a clean and even lay out. once that was done the mesh was then imported into maya. With a few careful but simple edge-loop selections around areas of joints, wrist, shoulders, the bottom of the storks, as close to the body as I could get with out being on the body, I then cut the seams from the "edit UV's" drop down menu and "cut UV edges". After this it was a case of opening the texture editor, moving the shells to see that they were clean and if there were any stray or miss cut edges, sewing and connecting them back together with the "move and sew selected edges" tool button. now that this was done I could rotate the shells by selecting the shell and using the main interface rotate tool and "move shell" button from the editor. the shells were set out with no overlaps and plenty of space for bleeding ect. a few sections were scaled up like the main body so that it retain more detail when the map was finally placed on. Rather than exporting the map to photoshop, the mesh was taken back into zbrush, using UV master again, the new UV map was copied. the high poly mesh was then selected and reduced to its lowest subdivision. 1 of 4 subdivisions. This mesh was then subject to UV master where simply hitting "paste UV's was enough to get the new UV map placed on the high poly mesh. The mesh was then moved back to its highest subdivision and painted using poly paint. I personally find the sketch shaded 3 material best to work with when painting as it gives a nice degree of highlights and shadows. It could have been poly painted in maya, but I find zbrush much easier. Once painted, it was a case of opening the UV map drop down, clicking create and clicking create from polypaint and the UV map was done! And that was it! I put it in photoshop after to play around with, emphasis the butt crack, but that was it, the eyes and irises were all done in zbrush!
|
AuthorAs if I haven't said enough on the home page already! Archives
July 2016
Categories |
 RSS Feed
